Solving the world's problems while fitting in our pants

Solving the world's problems while fitting in our pants

Tuesday, August 30, 2016

Crazy's Coconut Birthday Celebration

Not only did Cool have a busy birthday month in August, so did I!  Which I love because then I get to eat delicious cake too!  I dusted off my oven and decided August warrants a little baking on my end for the beautiful woman I know as my mother.


I try not to repeat myself when it comes to desserts because my beautiful mother deserves something new and delicious for her birthday taste buds to experience. I did consult with Cool on ideas for something new and exciting. She shared with me this gem and it is delicious.


What I love about this recipe is that it is easy but tastes decadent. I start out with Duncan Hines White Cake Mix, 3 egg whites and 1/4 cup of canola oil. Blend on medium for about 2 minutes. While it is blending, I greased and lightly floured my 9x13 inch pan and pre-heated the oven to 350 degrees. Once it was blended and my oven was ready, I baked the cake for about 23 minutes (I have a dark cake pan, so make sure to prepare the cake as indicated from the directions listed on the box). 


While the cake is baking, I mix together 1 can of sweetened condensed milk and 1 can of coconut milk. You will use half of the mixture (which is awesome because then you have it ready for another delicious cake in the future. Just freeze the other half for a later baking extravaganza!).


The timer should be going off!  Check the doneness of your cake by inserting a toothpick into multiple parts of the cake. If the toothpick comes out clean, the cake has finished baking. While the cake is still warm, poke holes with the end of a round cooking utensil.


Check out these stellar hole poking skills.


Again, while the cake is still warm, pour half of the condensed milk and coconut mixture onto the cake. As the cake sits and cools, it will absorb the milk mixture.


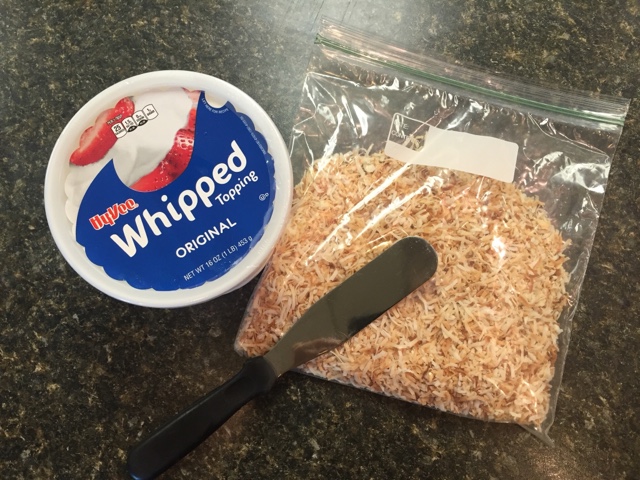
While the cake is cooling, take a large container of Cool Whip out of your freezer and bring to room temperature. Now I am a huge fan of coconut, so I mixed a 1 teaspoon of coconut extract into my cool whip. While those flavors meshed, I heated a medium size sauce pan to medium heat and toasted 1 package of coconut flakes. Make sure to continue stirring the flakes so they do not burn and take off the heat once the flakes start to turn a light brown. Those delicate flakes will continue to cook a little bit off of the burner.


When the cake is cooled completely, time to spread on the love. Generously spread the Cool Whip on top of the cake. I love Cool Whip. And no I did not get the light or fat-free kind either.


Because I wanted to do this.


Sprinkle on the toasted coconut. You can also opt to do fresh coconut if you like the flavor better. Whatever you like!  That is the beauty of this recipe. You could make cupcakes or 2-8 inch cakes as well.  For the next cake I bake, I will also top with mini-chocolate chips.


My mother was surprised an excited to blow out the candles on her yummy and decadent white coconut cake, made by yours truly. 


Happiest of Birthdays to You Mom!  I hope all your wishes come true!

Crazy's Coconut Cake

1 - 18.25 ounce package white cake mix
1 - 14 ounce can unsweetened coconut milk
1 - 14 ounce can sweetened condensed milk
1 - 16 ounce package thawed frozen whipped topping
1 teaspoon coconut extract
1 - 7 ounce package toasted flaked coconut

1.  Prepare and bake white cake mix according to packaged directions.
2.  Remove cake from oven.
3. While still hot, using a utility utensil, poke holes all over the top of the cake.
4. Let cake cool completely.
5. While the cake is cooling, mix coconut milk and sweetened condensed milk together. Use one half of the mixture for the cake. Freeze the other half for future use.
6. Toast coconut by heating a medium size sauce pan to medium heat, constantly stirring until coconut is light brown, about 5 minutes.
7. When cake is cool, generously frost with the whipped topping and coconut.
8. Keep cake refrigerated.

~Crazy


Wednesday, August 10, 2016

The Colors in Caprese


This is not new earth shattering information that I love anything caprese. Tomatoes, basil, fresh mozzarella and balsamic are a few true loves of my food life. Not only do I want to share with you my latest crazy caprese creation, but I want to share with you the nutrition know how of how this combination is extremely healthy for you. 


This spectacular components of food carry an enormous nutrition punch. Let me take you back to basics of MyPlate. MyPlate is an easy way to create balance and portion control when it comes to meals and snacks. When you eat within these simple guidelines, you are creating harmony with your nutrients, both macro and micro.  When there is a balance of food groups and nutrients, your body performs at its peak, you fill content and fuller longer and you are able to maintain a healthier weight. The more color on your plate, the more nutrients available to distribute to your whole body. 


When planning meals, here are some easy guidelines using MyPlate:

1. Protein at every meal and snack as your most important food group.
2. Meals should have 3 of the 5 food groups (with 1 always being protein).
3. Snacks should have 2 of the 5 food groups (with 1 always being protein).
4. A portion size of any food group is generally the size of YOUR OWN fist. (sorry, you cannot borrow a friends fist that is bigger so you get more pasta on your plate).

These guidelines are simple, portable and able to be executed anywhere and everywhere, including restaurants, convenience stores, the ball park and anywhere you travel to.  Cue the caprese!

For my perfect MyPlate summer meal, caprese covers all the rules.

Protein:  Fresh Mozzarella
Vegetables:  Tomatoes and Basil
Grains:  Bread

You can find a wealth of information on MyPlate from calorie needs, meal planning, what foods fall in each food group and more here.  If you still have more questions or would like more individual help, I am your girl and you can contact me anytime!

Now it's time to drool and get hungry.....


For my sandwich, I chopped, seasoned and cooked down some fresh garden tomatoes. Feel free to use canned seasoned tomatoes or jarred pasta sauce. All forms of concentrated tomatoes are very healthy. Just be cautious of sodium and sugar. Many of your jarred pasta sauces have a lot of extra sugar, so I tend to use canned, lower sodium seasoned tomatoes. 

I warmed a pan over medium heat and sprayed my Italian bread with a little olive oil spray on both sides. Use a nice sturdy bread and always go for an whole grain option if it is available. Another favorite of mine is sourdough because it browns nicely and the sourdough flavor compliments the sweetness of the tomatoes and basil. Before adding the tomatoes to the bread, I let the bread warm up for about 2 minutes. 


After the tomatoes are added, generously place fresh basil leaves on top, sprinkle a little freshly grated parmigiano-reggiano cheese to intensify the flavor and a pinch of cracked black pepper. Let the open face sandwich continue to warm for about 1 minute. 


While that is warming, slice room temperature fresh mozzarella in very thin slices. Room temperature and thin slices are very important because your bread is almost toasted perfectly and if your cheese is not room temperature and sliced thinly, it will not melt nicely. Combine the halves in the pan and finish cooking for about 2 more minute. If you tend to get a little crazy with your cheese, as I sometimes do, that is ok. You can always finish it off in a warm oven to melt the cheese a little more. 


My perfect summer meal would not be perfect without a side of cherries. I also dipped my summer sammie in a little balsamic vinegar and it was dreamy!  Who knew something that seemed so indulgent could be MyPlate perfect?

~Crazy


Tuesday, August 2, 2016

It's Birthday Week!

In my house we have what we call "birthday week."  We do this because all 3 of my children have their birthdays in a matter of 2 days.  My twin sons turned 6, August 14th, and then their younger sister turned 4 on August 15th.   

I always grew up knowing that my birthday was special and when I had kids I wanted to do the same thing for them.  I think I also wanted to make sure that they always felt extra special on their birthday because the boys would always have to share their birthday and then with their sister being born just the day after theirs, I knew I had to step up my game. 

This year was the first time that we did a combination of themes for the family birthday party. (For the past 4 years I have been able to get away with 1 theme). 

This year it was "Rainbows and Pokemon!"  When asking the boys about what we should do for their cake they said they wanted a "Pokemon ice cream cake with Blue Bunny Birthday Cake ice cream."  Well that was specific.  So then I ask Piper what she would like and she wanted "rainbow cupcakes."  Whew, okay I can do that.  Thanks for making that easy.  

This is what we came up with for Piper's rainbow cupcakes.  Cute, easy, and delicious.  We also had confetti cupcakes as well just didn't get a picture.  The rainbows are just little sour ribbon candy that I cut in 1/3.

After we figured out Piper's cupcakes I started figuring out how to do some amazing ice cream cake Pokemon ball.  I can do this right?!?!  I mean I couldn't just call Dairy Queen to have them make it since they wanted certain ice cream in it!?!?!  So I did some research and little to my surprise, found nothing helpful on the internet about how to make a round ice cream cake (because it was only ice cream no actually cake in it).  

With a lot of thinking and planning I came up with an idea and then made a plan, with 3 backup plans.

Plan A: make an ice cream cake Pokemon ball

Plan B: make an ice cream cake Pokemon semi ball

Plan C: just use a springform pan to layer ice cream and decorate it to look kind of like a Pokemon ball

Plan D: call Dairy Queen to do it!

Lucky for me I only had to go to plan b.  

This ice cream cake was going to be triple layer with the top layer being Blue Bunny Cherry Pickin' Chocolate, the middle layer being the birthday cake ice cream, and then the bottom layer being Kemp's vanilla bean frozen yogurt, with fudge and crumbled Oreos in the middle of each layer.  

I started with a Pyrex bowl and a springform pan.  

I spread about 3 cups on the bottom of the bowl and pan. 

Used some hot water to smooth out the layers.


And then covered the pans to freeze them for a couple hours so that I could put the fudge and Oreo layer.

In the meantime I recruited help to crush the Oreos from a couple of the going to be birthday kids.


I removed the ice cream from the freezer and added Oreos to the cherry layer first since it would be flipped upside down.
And then we added the Mrs. Richardsons hot fudge sauce, about 1/2 jar.

We then added the birthday cake ice cream, and let it all freeze again overnight!


The next morning as you can see I needed to put the semi ball together.  I ended up turning the Pyrex bowl over with my hand in the bottom and running it under water to get it out of the bowl.  


Finally it came out and here's my helper in the morning licking up all extras!

Here's the 3 layer cake put together, and then I covered it with plastic wrap and froze it overnight again.

I then called in a cake decorator friend to help me with the beautifying of the Pokemon ice cream cake and it turned out Amazing!


I will disclose that I decided to take the ice cream cake home on a 100 degree day and it melted a little.  It still looked very cool but I guess it then looked a little more "homemade" 😁. 

I showed Cyril and Paxton their cake and told them what had happened and they still were in awe of the Pokemon ice cream cake and they loved it.  They said "don't worry mommy it doesn't have to be perfect.  We still like it and want to eat it."  And right there I knew that sometimes I try to do everything perfect in life and even though I might have some #momfails, I am doing pretty good with making memories for my little ones.  

I will say that even though it might not of looked the best when we ate it, it was the best birthday ice cream cake and the Flavors of the ice cream with the thick layers of fudge and cookie crumbles were delicious.  I know I would do some things differently if I did one again but I think for the first time it turned out great.

Here's also some other fun things that we did for birthday week! 

Birthday mornings consist of sugar as well!  Confetti birthday pancakes with frosting, syrup and more sprinkles! 

Nighttime adventures in Omaha trying to find candy since our hotel didn't have any!

Omaha Zoo! 

We can't take a normal picture.

And I realized what my future with look like in 10-12 years when they can all drive!! 😁 Scary!!


What do you do for birthdays?  Do you make them super special or just another day?


August is National Peach Month


I don't know if there is anything better than a fragrant and ripe peach.  I have always loved peaches all my life and I will say that the past couple years I haven't had the best luck with peaches but this year my love of peaches was renewed when our produce manager got in Missouri peaches.  I know every state has peaches and I'm not trying to start a state peach war, but I'm going to throw it out there that Missouri peaches are the best peaches out there.  Oh man, this is what life is about. These peaches are AH-MAZING!  There I said it!  I mean I should know, I have had at least one a day for the past couple weeks.  I feel like my stomach is getting ready to hibernate and trying to stock up for when the weather gets colder and all I'm left with is apples and oranges as my go to fruit.


Lucky for you I have a delicious and quick and fun recipe to include peaches.  You can use frozen peaches in the recipe and enjoy this recipe all year long if you would like and it's just as delicious.

The recipe is a peach cobbler with a twist.  The twist being that one day when I was asking my boys what else I should add to this dessert to kick it up a notch, one said I should add blueberries, and the other said I should add pineapple.  Hence how the Wertzberger Fruit Cobbler was born and boy was it delicious! 


All you need is these few ingredients!


Let's start by first cutting the pineapple: Cut the top and bottom off the pineapple and throw away.

Next slide your knife down the pineapple discarding the hard out skin and the brown eyelets that are very woody. 


Next cut the pineapple in 1/4th to remove the center hard core.


Take the pineapple and cut into small dices.


Once the pineapple and peach are cut, put all the fruit, cornstarch, sugar, and cinnamon in the pan.

Pour over the unprepared box cake mix and top with a stick of butter.


Throw it in the oven for 40-55 minutes and Viola!!!


So delicious!!  Let it cool a little bit and serve up warm.  If you want true bliss add some vanilla bean ice cream!!


Wertzberger Fruit Cobbler


½ fresh pineapple, cored, and diced                                   
3 c. peaches, frozen or pitted and sliced
2 c. blueberries, fresh                                                                         
1 box yellow cake mix
¼ c. Sugar                                                       
2 tbsp. Cornstarch
1 tsp. Cinnamon, ground
1 c. water, apple or pineapple juice
1 stick butter, sliced thinly 


Preheat oven to 350 degrees.  In a sprayed 9x13 pan add the pineapple, peaches, blueberries, sugar, cornstarch and cinnamon and stir until all incorporated.  Pour the water or juice over top the fruit and mix.  Sprinkle the cake mix on top of the fruit without stirring.  Lastly cut the butter into small pieces and lay over top the cake mix.  Place pan in the oven and cook for 40-55 minutes until cake browns and a knife comes out clean.  Remove from oven and let cool for 10 minutes before eating.

-Cool