Solving the world's problems while fitting in our pants

Solving the world's problems while fitting in our pants
Showing posts with label Hy-Vee. Show all posts

Tuesday, August 30, 2016

Crazy's Coconut Birthday Celebration

Not only did Cool have a busy birthday month in August, so did I!  Which I love because then I get to eat delicious cake too!  I dusted off my oven and decided August warrants a little baking on my end for the beautiful woman I know as my mother.


I try not to repeat myself when it comes to desserts because my beautiful mother deserves something new and delicious for her birthday taste buds to experience. I did consult with Cool on ideas for something new and exciting. She shared with me this gem and it is delicious.


What I love about this recipe is that it is easy but tastes decadent. I start out with Duncan Hines White Cake Mix, 3 egg whites and 1/4 cup of canola oil. Blend on medium for about 2 minutes. While it is blending, I greased and lightly floured my 9x13 inch pan and pre-heated the oven to 350 degrees. Once it was blended and my oven was ready, I baked the cake for about 23 minutes (I have a dark cake pan, so make sure to prepare the cake as indicated from the directions listed on the box). 


While the cake is baking, I mix together 1 can of sweetened condensed milk and 1 can of coconut milk. You will use half of the mixture (which is awesome because then you have it ready for another delicious cake in the future. Just freeze the other half for a later baking extravaganza!).


The timer should be going off!  Check the doneness of your cake by inserting a toothpick into multiple parts of the cake. If the toothpick comes out clean, the cake has finished baking. While the cake is still warm, poke holes with the end of a round cooking utensil.


Check out these stellar hole poking skills.


Again, while the cake is still warm, pour half of the condensed milk and coconut mixture onto the cake. As the cake sits and cools, it will absorb the milk mixture.


While the cake is cooling, take a large container of Cool Whip out of your freezer and bring to room temperature. Now I am a huge fan of coconut, so I mixed a 1 teaspoon of coconut extract into my cool whip. While those flavors meshed, I heated a medium size sauce pan to medium heat and toasted 1 package of coconut flakes. Make sure to continue stirring the flakes so they do not burn and take off the heat once the flakes start to turn a light brown. Those delicate flakes will continue to cook a little bit off of the burner.
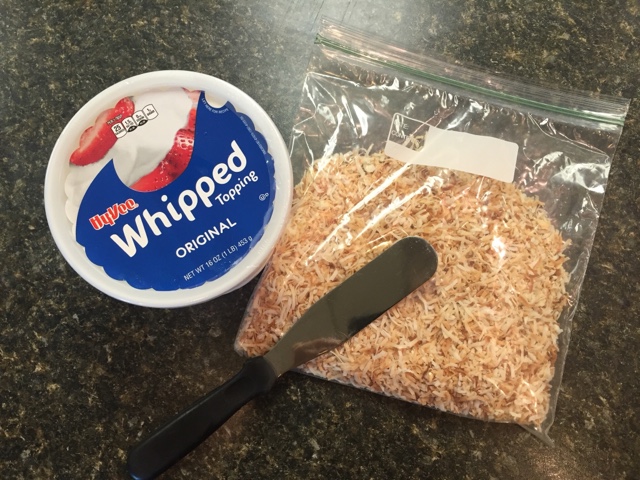


When the cake is cooled completely, time to spread on the love. Generously spread the Cool Whip on top of the cake. I love Cool Whip. And no I did not get the light or fat-free kind either.


Because I wanted to do this.


Sprinkle on the toasted coconut. You can also opt to do fresh coconut if you like the flavor better. Whatever you like!  That is the beauty of this recipe. You could make cupcakes or 2-8 inch cakes as well.  For the next cake I bake, I will also top with mini-chocolate chips.


My mother was surprised an excited to blow out the candles on her yummy and decadent white coconut cake, made by yours truly. 


Happiest of Birthdays to You Mom!  I hope all your wishes come true!

Crazy's Coconut Cake

1 - 18.25 ounce package white cake mix
1 - 14 ounce can unsweetened coconut milk
1 - 14 ounce can sweetened condensed milk
1 - 16 ounce package thawed frozen whipped topping
1 teaspoon coconut extract
1 - 7 ounce package toasted flaked coconut

1.  Prepare and bake white cake mix according to packaged directions.
2.  Remove cake from oven.
3. While still hot, using a utility utensil, poke holes all over the top of the cake.
4. Let cake cool completely.
5. While the cake is cooling, mix coconut milk and sweetened condensed milk together. Use one half of the mixture for the cake. Freeze the other half for future use.
6. Toast coconut by heating a medium size sauce pan to medium heat, constantly stirring until coconut is light brown, about 5 minutes.
7. When cake is cool, generously frost with the whipped topping and coconut.
8. Keep cake refrigerated.

~Crazy


Tuesday, October 20, 2015

A Different Halloween Delight

During the fall, everyone tends to go off the deep end when it comes to pumpkin. Pumpkin flavored lattes, cookies, bread and even protein bars. I am "in-likes" with pumpkin, let me share with you why.  My first ever pumpkin cooking experience was for Thanksgiving in 2000. My family hosted Thanksgiving each year and each year we had the same desserts, pumpkin and apple pie. I decided that year to make a delicious homemade pumpkin cheesecake. It was full of calories and yumminess. Unfortunately, not many of my family members agreed because it wasn't traditional. Only 2 people tried my cheesecake that I spent almost 4 hours making. This is why I am not "in-love" with pumpkin. This week, Cool and I had our monthly recipe "Throwdown" with a Halloween theme and pumpkin was the first thing that came to mind, so I thought I would give it another whirl. This time around without slaving 4 hours and also increasing the health of it.


Start off with an 8 oz container of 1/3 less fat cream cheese and blend with 1/4 cup of powdered sugar. You can use a stand or hand mixer for this recipe.


Blend until creamy and add 1 cup of canned pumpkin, mix well.


I got a hold of this awesome natural Pumpkin Spice extract from McCormick and added in 1/2 tablespoon. If you have the dried spice, I recommend adding in 1 tablespoon. Mix well.


To add body to the dip as well as nutrients as protein, I added in 1 small container of plain fat-free Siggi's Yogurt. You can also use a fat-free plain Greek Yogurt.


For the final addition, add in 1/2 of a container of light whipped topping. This will add a little more creaminess to the dip and cheesecake texture.


Choose fun things to dip. I really thought the Scooby-Doo! cracker sticks were awesome because they are shaped like bones (I had quite a few people as me if they were dog treats, hilarious). Sliced apples, banana ghosts (banana chunks with raisins for eyes) and pretzels were my other dippers.


Pumpkin Cheesecake Dip

Yield: 10 to 12 servings

Ingredients

  • 1 (8oz) pkg light cream cheese
  • 1/4 cup powdered sugar
  • 1 cup pumpkin puree (NOT pumpkin pie filling)
  • ½ Tbsp pumpkin pie spice extract or 1 Tbsp of pumpkin pie spice
  • ½  (4 oz) tub light whipped topping
  • 1 (5 oz) container of plain Greek yogurt

Instructions

  1. With a handheld mixer and large bowl, beat the cream cheese with the powdered sugar until smooth.
  2. Mix in the pumpkin puree and pie spice.
  3. Beat in the whip topping and yogurt until mixed thoroughly and the beaters leave ripples in the dip.
  4. Top with a sprinkle of cinnamon or pumpkin pie spice.
  5. Serve with apples, pretzels, vanilla wafers or your favorite dippers.


~Crazy


Tuesday, December 16, 2014

UnBelizeable Shrimp Pasta

Weeknight meal on the table in less than 20 minutes?  A recipe that everyone will like and eat? Yes please!  Well lucky for you, because I have a recipe that produces delicious comfort food without producing a tinge of guilt.  

Have you been to Hy-Vee lately to see what shrimp they have?  They have some shrimp that comes from Belize, and if you haven't tried it than you are missing out.  I will tell you that I'm not a huge shrimp fan.  It's alright and occasionally I will eat it at parties but usually it doesn't make it's way into our weeknight family dinner menu.  This was the case until I tried the Belize shrimp, this shrimp is the sweetest and firmest shrimp you will taste.  They even have a frozen shrimp that is already cooked, peeled without tails on it and all you have to do is run it under cold water that taste amazing!  So if shrimp is on your menu for the holidays, check it out.  You will not be disappointed at all, just make sure it says "Belize" shrimp or ask.
 
Look at this dish.  Who says you can't have colorful food in the winter?
 

Okay first thing first, get that water boiling and cook the pasta according to the directions on the box. 


Now get the large skillet hot and add in the oil and shrimp.


While the shrimp is cooking, cut the roasted red peppers into long thin strips.  Even though the shrimp only takes one to two minutes, you will still have time to do this. 


Go back to the shrimp and flip them over so that they all evenly cook.


Add in the red peppers strips and remove from heat.


toss in the pesto and set aside.
 

One trick that I do at home, is put the spinach in the collander while I am draining the pasta. 

 
As you drain the pasta, pour it over the spinach and mix it with a spoon or tong so it equally steams the spinach.  If you like your spinach cooked a little bit longer, you can add in your spinach to the pot of boiling pasta water for the last minute before draining it.
 

Add the pasta and spinach back to the pot, and add in the pesto shrimp.
 

Divide into 4 plates or bowls and enjoy!


What cute little dinner dates I had for this meal!  And yes, they ate it and loved it.


Even Cyril thought the shrimp was unBelizeable!


Shrimp Pesto Pasta
Serves 4

8 oz. rotini, cooked according to instructions on box
1 Tbsp. olive oil
1 lb. shrimp, raw, peeled, deveined
1/2 c. roasted red peppers, sliced thinly 
1/4 c. pesto, prepared
2 c. baby spinach

In a large skillet over medium high heat, add the olive oil and shrimp.  Cook for about 1-2 minutes, and flip shrimp over.  Add in the red peppers and cook for 1 more minute or until shrimp is cooked thoroughly.  Take off heat and add in the pesto.  For the spinach add to the collander before draining pasta and toss to steam the spinach with the noodles.  Transfer pasta back to the pot and toss with pesto pasta. 

This pasta can be served warm or cold.

-Cool